For paraplegic adaptive skiers, properly sized outriggers should match your arm span and seated posture. Customize handles with Velcro straps for better grip and plant outriggers while leaning into turns. Widen your outrigger stance on steeper terrain and lock adaptive tips on icy surfaces. Regularly inspect and clean your equipment, and communicate with lift operators for assistance. Build upper body strength through targeted exercises like lat pulldowns and tricep extensions. These fundamentals will transform your adaptive skiing experience.
Selecting the Proper Outrigger Length for Your Body Type
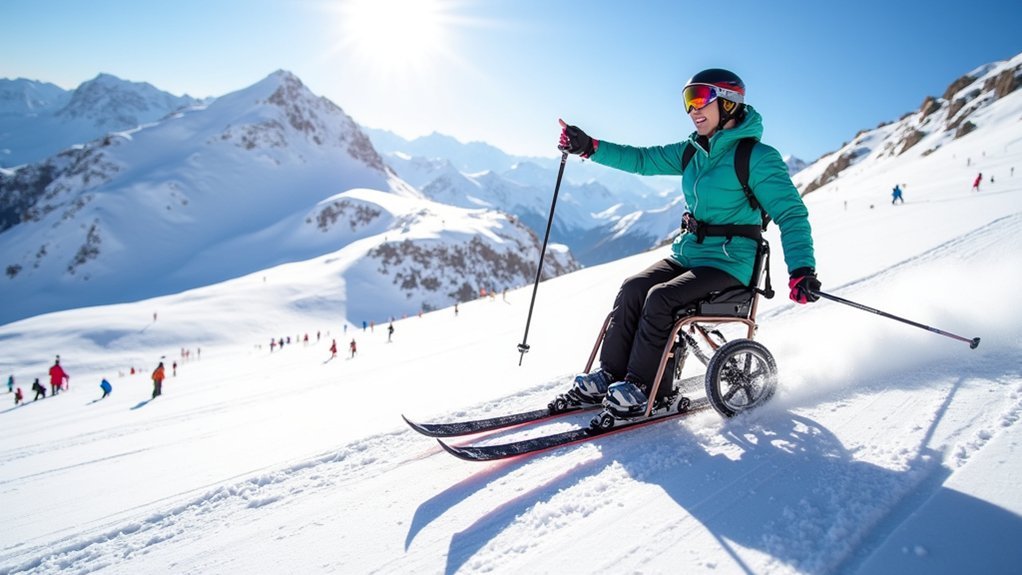
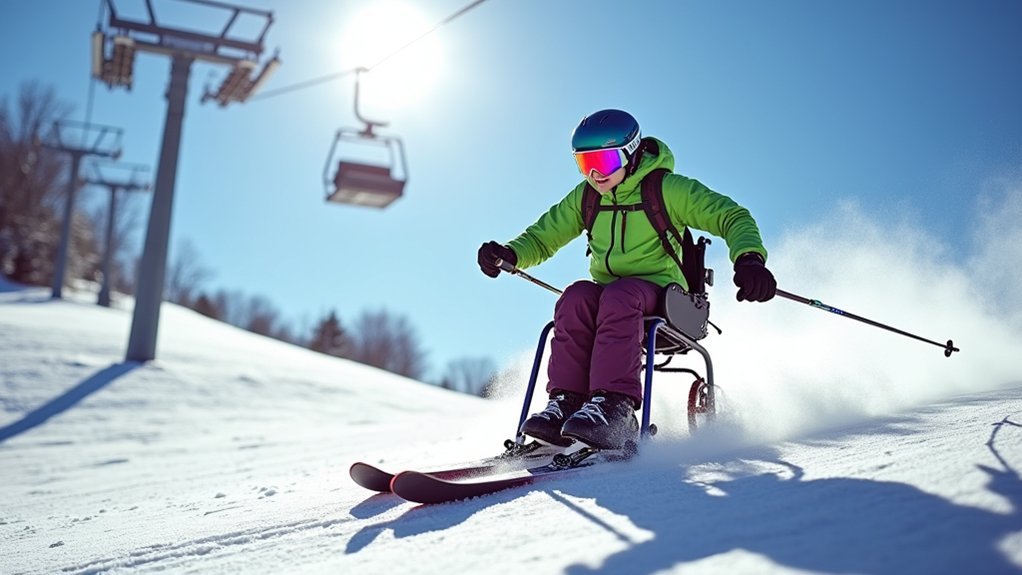
The foundation of successful adaptive skiing begins with correctly sized outriggers. When determining the ideal length for your setup, consider both your arm span and seated posture in your sit-ski equipment.
Proper outrigger sizing—considering arm span and seated posture—creates the foundation for adaptive skiing success.
Your outriggers should allow for comfortable arm extension without overreaching, which could compromise your balance. Generally, your arms should bend at a natural angle when holding the outriggers against the snow. Too short, and you’ll hunch forward; too long, and you’ll overextend.
For proper fitting, work with an adaptive skiing professional who can evaluate your upper body strength, mobility, and specific needs. They’ll help adjust not only the length but also the cuff position and handle grip to prevent fatigue during longer skiing sessions. Consulting with trained instructors specifically experienced in adaptive sports will ensure you receive personalized recommendations for your unique situation.
Remember that outrigger adjustments directly impact your control and safety on the slopes.
Mastering Outrigger Position During Turns and Stops
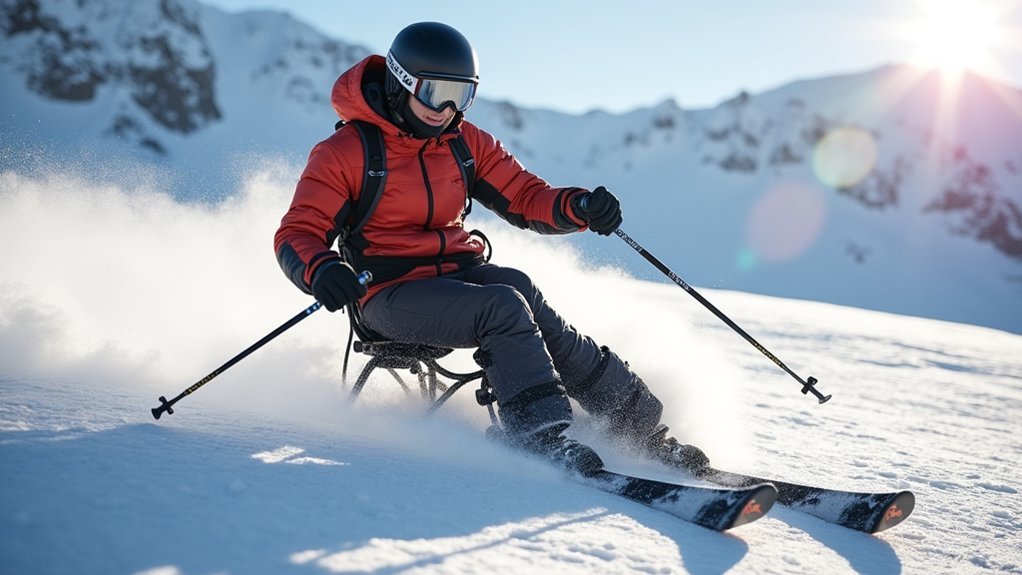
To execute effective turns on your sit-ski, you’ll need to master the pivot and plant technique with your outriggers positioned slightly ahead of your body.
Your weight shift mechanics directly impact turn precision—lean into the turn while simultaneously adjusting the angle of your downhill outrigger for stability.
Remember to keep your movements fluid and synchronized, allowing the outriggers to guide your momentum rather than forcing them against the snow.
Practice using outriggers with varying lengths to find the perfect height match for optimal control and balance during your adaptive skiing session.
Pivot and Plant Technique
Mastering the pivot and plant technique transforms your adaptive skiing experience, giving you greater control and independence on the slopes.
When turning, use the pivot technique by shifting your weight and leveraging your outrigger’s ski tip to initiate and control the turn. Position your outriggers to maintain balance throughout the rotation, keeping your core engaged.
For stopping, employ the plant technique by firmly embedding your outrigger tips into the snow. Utilize the adjustable brakes on your outriggers for additional control when slowing down.
Proper positioning during planting is essential—keep your outriggers at the right angle and distance from your body to maintain stability. Three-track skiing combines this technique effectively with one full-size ski and two outriggers for optimal balance and control.
Regular practice with an experienced instructor will help you develop the muscle memory needed for effective pivot turns and confident stops.
Weight Shift Mechanics
Successful adaptive skiing relies heavily on proper weight shift mechanics, which form the foundation of smooth, controlled movements on the slopes. You’ll need to transfer your center of mass before releasing an edge, using minimal body movement to maintain balance.
When turning, shift your weight slightly in the direction you want to go while keeping your torso aligned with your legs. Engage your core muscles to execute effective weight transfers without overextending your upper body. Practice these shifts on flat terrain first to build confidence.
Adjust your outrigger height for ideal stability based on the maneuver you’re attempting. For effective turns, coordinate your weight shift with a synchronized outrigger plant. During high-performance turns, focus on relaxing the downhill ski to naturally allow your center of mass to cross into the new turn direction.
Customizing Outriggers for Your Specific Mobility Needs
When selecting outriggers for adaptive skiing with paraplegia, customization becomes essential for maximizing both comfort and performance on the slopes.
Your upper body strength, balance needs, and skiing experience level all factor into finding the right equipment for your journey.
For ideal results, consider these key customization factors:
- Material choices – Lightweight aluminum works well for beginners, while titanium offers enhanced performance for advanced skiers who need precision and reduced weight.
- Adjustability requirements – Standard adjustable outriggers accommodate various terrains while custom-built models provide exact measurements for competitive skiers.
- Attachment options – Velcro straps can greatly improve your control and grip, especially important when you’re skiing from a seated position. Many adaptive skiers find that velcro attachments significantly enhance control while navigating turns on mono-skis.
Transitioning Between Flat Terrain and Steeper Slopes
Mastering the shift between flat areas and steeper slopes requires you to develop effective weight shifting techniques in your torso and arms.
You’ll need to learn how to assess terrain changes ahead of time, looking for visual cues that indicate gradient shifts.
When approaching a steeper section, position your outriggers slightly wider and prepare to redistribute your weight backward to maintain control as the slope angle increases. For those using a monoski setup, the single ski beneath your seat requires greater balance and coordination when transitioning between different slope gradients.
Weight Shift Techniques
Shifting between varying slope gradients demands precision in weight shift techniques for adaptive skiers with paraplegia. Your center of gravity manipulation is vital since each sit ski setup is uniquely tailored to your body composition. As you approach changes, focus on timing your weight shifts to maintain control.
When tackling terrain alterations, remember these key strategies:
- Forward weight distribution – Shift slightly forward when moving from flat to steeper terrain to prevent tipping backward.
- Hip engagement – Use your hips as primary movement initiators to facilitate smoother changes.
- Edge-to-edge transfer – Practice gradual edge releases and engagements rather than abrupt movements.
Using your outriggers as stabilizers during these changes helps establish proper balance points while your body adjusts to the changing slope angles.
Terrain Assessment Skills
Successful terrain assessment serves as the cornerstone of adaptive skiing for those with paraplegia. You’ll need to evaluate slope angles, run-out zones, and snow conditions before attempting any new terrain. Start on wide, flat areas and progressively move to gentle slopes with safe stopping zones.
| Terrain Type | Assessment Factors | Equipment Adjustments |
|---|---|---|
| Flat Areas | Visibility, space for maneuvers | Standard outrigger position |
| Gentle Slopes | Run-out zones, turning space | Adjust outriggers for turning support |
| Steeper Terrain | Obstacle presence, snow condition | Set outriggers for speed control |
When shifting to steeper slopes, practice controlled turns on gentler terrain first. Adjust your outriggers to provide additional stability and speed control. Remember, your equipment should complement your skill level—don’t hesitate to modify outrigger settings as terrain changes.
Weather-Specific Outrigger Adjustments for Better Control
When weather conditions change on the slopes, your outrigger adjustments need to adapt accordingly for ideal control and safety. The variable length feature of your outriggers becomes particularly valuable as snow consistency shifts throughout the day.
For best performance in different conditions:
- Icy Surfaces – Lock your adaptive tips for increased stability and better edge control when maneuvering hard-packed or icy terrain.
- Soft Snow – Adjust your outriggers to a slightly longer setting to prevent them from sinking too deeply and maintain effective turn initiation.
- Variable Conditions – Consider customizing your setup with lightweight materials for quicker responses when moving between sun-softened and shadowed areas.
Remember that properly adjusted outriggers greatly enhance your dynamic balance, allowing you to maintain control regardless of weather challenges. For three track skiers, incorporating proper outrigger technique helps maintain static and dynamic balance while executing precise skiing movements on a single leg.
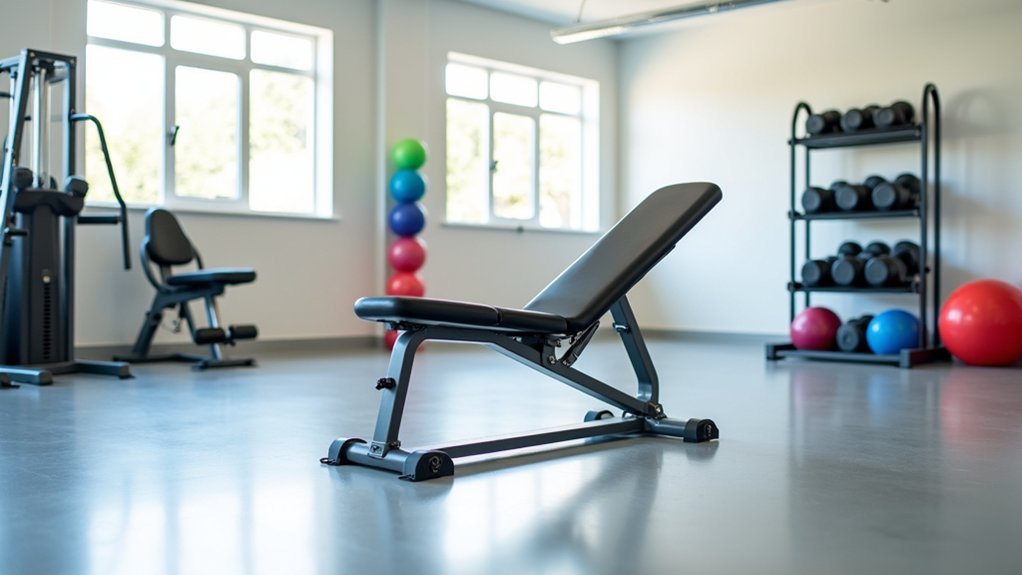
Building Upper Body Strength for Effective Outrigger Use
Strong, well-conditioned upper body muscles form the foundation of effective outrigger control while adaptive skiing. Focus on lat pulldowns and bicep curls using resistance bands to develop the pulling strength needed for outrigger manipulation. Incorporate triceps extensions to build pushing power essential for pole plants.
Maintain core stability during all exercises by engaging your abdominals and maintaining neutral spine alignment. This trunk stability maximizes your strength development while preventing injury. The consistent practice of these exercises stimulates nervous system rewiring that can lead to improved motor function and control.
Progress gradually by increasing resistance through bands or weights under proper therapist guidance. Complement strength training with cardiovascular exercises like hand cycling or swimming to build endurance.
Don’t underestimate everyday movements—wheelchair transfers, dressing, and personal care activities all contribute to functional strength that translates directly to better outrigger control on the slopes.
Navigating Chairlifts and Gondolas With Outriggers
Safely maneuvering chairlifts and gondolas presents one of the most challenging aspects of adaptive skiing for individuals with paraplegia.
You’ll need to choose appropriate outrigger types—handheld for greater flexibility or fixed ones when using specialized equipment like Mountain Man or Biunique bi-skis. Always communicate with lift operators to guarantee they slow loading speeds for your safety.
For successful chairlift navigation:
- Position yourself by leaning back and securing your outriggers during the ride
- Request liftee assistance during loading and unloading processes
- Verify your equipment is compatible with the chairlift system, especially if using a sit ski
Remember that proper outrigger positioning not only helps with balance during transit but also assists with maneuvering on flat terrain between runs. The best practice is to aim for normal unloading speeds which can help maintain momentum when skiing out of the lift area.
Outrigger Maintenance and Equipment Care Guidelines
Proper maintenance of your outriggers forms the foundation of safe and effective adaptive skiing. Regularly inspect for cracks, sharp edges, and wear that could compromise your safety on the slopes. Clean your equipment after each use to prevent corrosion and guarantee smooth operation of adjustment mechanisms. For paraplegic skiers, understanding that outriggers can be utilized with mono-ski equipment is essential to maximize your adaptive skiing experience.
| Maintenance Task | Frequency | Importance |
|---|---|---|
| Damage inspection | Before each use | Critical for safety |
| Cleaning | After each session | Prevents corrosion |
| Adjustment check | Weekly | Guarantees proper fit |
Store your outriggers in a dry location away from direct sunlight when not in use. Consider your specific needs based on snow conditions and skiing style when making adjustments. Remember that proper equipment care not only extends the life of your outriggers but greatly enhances your performance and safety.
Progressing From Four-Track to Three-Track Techniques
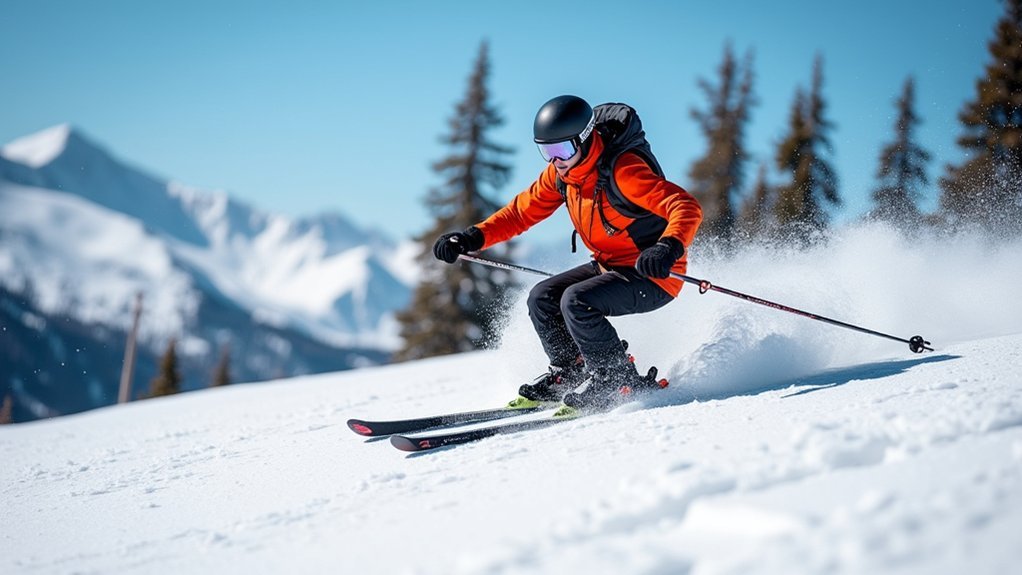
Shifting from four-track to three-track skiing requires mastering weight distribution between your single ski and outriggers to maintain proper balance during movement.
You’ll need to develop your single-leg muscles through focused exercises that build strength and endurance in the remaining limb.
As you progress, you can gradually move more weight to your ski and less to your outriggers, allowing for improved maneuverability and a more dynamic skiing experience.
Working with qualified instructors who specialize in adaptive techniques will provide personalized guidance as you transition between skiing methods.
Outrigger Weight Distribution
As skiers with paraplegia build confidence on the slopes, mastering weight distribution between outriggers becomes essential for advancement from four-track to three-track techniques. Proper weight shifting creates stability while reducing dependency on support equipment.
When developing your outrigger technique, focus on these critical elements:
- Stance adjustment – Position your body to evenly distribute weight between skis and outriggers for maximum control.
- Turn initiation – Use outriggers as balance points when beginning turns, gradually shifting weight to initiate direction changes.
- Gradual height adjustments – As your skills improve, work with your instructor to raise outrigger height, promoting greater independence.
Your upper body strength will naturally increase as you practice these techniques, making the change to three-track skiing smoother and more achievable. Many participants find that participating in professionally guided lessons through adaptive skiing programs provides the structured support needed for this important technical progression.
Balancing During Transition
When you’re ready to progress from four-track to three-track skiing, your balance becomes the central focus of this technical change.
Begin by gradually reducing your reliance on outriggers while strengthening your core and lower body.
Adjust your outrigger height and brake settings as your balance improves. You’ll need space for on-hill adjustments—the bolt controls braking while cuff adjustments optimize your stance.
Practice on varied terrain to enhance control, making incremental changes to outrigger dependency.
Your instructor will assess your readiness based on leg strength and stability. Certified professional instructors can provide personalized guidance throughout this transition process.
Incorporate off-mountain exercises to build upper body strength and core stability.
Consider using ski stabilizers or tip clamps for additional support during early change phases.
Always progress at your own pace, prioritizing safety and comfort while building confidence on increasingly challenging slopes.
Single-Leg Muscle Development
Strong single-leg muscles form the foundation for successful progression from four-track to three-track skiing.
You’ll need to develop both core and upper body strength while focusing intently on your functional leg. Begin with targeted exercises like single-leg squats that simulate skiing positions, gradually building both stability and endurance. Understanding that balance and efficiency are key components in adaptive skiing techniques will help you master the transition more effectively.
To successfully shift to three-track skiing:
- Balance exercises – Practice daily on unstable surfaces to improve proprioception and stability
- Core strengthening – Focus on rotational movements that mimic skiing motions
- Upper body training – Build shoulder and arm strength to effectively use outriggers
Your equipment setup greatly impacts muscle development.
Properly adjusted outriggers with appropriate brake settings allow you to gradually shift more weight onto your skiing leg while maintaining confidence and control.
Combining Outriggers With Other Adaptive Equipment
Successful adaptive skiing for paraplegic individuals often depends on the strategic combination of multiple equipment pieces working together.
When using outriggers with your sit-ski equipment, you’ll need to take into account which setup best matches your abilities and goals.
For mono-skiing, outriggers provide essential balance while allowing independent navigation. High-quality outriggers made from carbon fiber materials significantly reduce physical strain while maintaining necessary stability during turns. If you’re beginning, bi-skis paired with outriggers offer greater stability before progressing to more advanced equipment.
Tethers can be attached to your sit-ski with instructors providing guidance from behind.
Think about adding ski stabilizers like tip clamps to maintain proper alignment, especially when you’re new to the sport.
For maximum safety and comfort, make sure your harness securely connects to tethers, and add padding to customize your seating position.
This integrated approach will enhance your control and confidence on the slopes.
Frequently Asked Questions
How Do Outriggers Affect Balance During Unexpected Falls?
Outriggers give you extra points of contact with the snow, stabilizing your body during unexpected falls. They’ll help you quickly adjust your position, absorb impact, and regain balance, but you’ll need strong arms to use them effectively.
Can Outriggers Be Used Effectively for Adaptive Cross-Country Skiing?
Yes, you can use outriggers for adaptive cross-country skiing, but you’ll need modified versions with lighter materials and different tips designed for the longer, rhythmic strides rather than standard downhill outriggers.
What Certification Do Instructors Need for Teaching Outrigger Techniques?
You’ll need a PSIA-AASI Level I certification in Alpine or Snowboard first, then pursue specific adaptive certifications. These include training on outrigger techniques through workshops that assess your skiing, teaching, and technical skills.
How Do Travel Regulations Impact Flying With Adaptive Ski Equipment?
You’ll face airline-specific policies when flying with adaptive ski equipment. Check weight limits, prepare for extra fees, arrange special handling, and arrive early. Consider travel insurance to protect your valuable adaptive gear.
Do Insurance Policies Typically Cover Outrigger Damage or Replacement?
Most standard insurance policies don’t cover outrigger damage. You’ll need specialized equipment coverage, a rider on your homeowner’s policy, or sports equipment insurance to protect your investment. Check your policy details carefully.
In Summary
You’re now equipped with essential outrigger techniques to enhance your adaptive skiing experience. Remember, your equipment should adapt to you, not the other way around. Don’t hesitate to seek guidance from adaptive instructors as you progress. With practice and proper outrigger use, you’ll navigate varied terrain with increasing confidence. Keep maintaining your equipment and adjusting your techniques—your skiing independence and enjoyment await on the slopes!
Leave a Reply